
Are you ready to tile your floor, but have noticed that the surface is not quite even throughout the room? Luckily, not all hope is lost, and tiling uneven floors is possible – it’s just a slightly different process that might require a little extra preparation and effort!
Whether you’re fixing limestone tiles or architectural porcelain tiles, when presented with an uneven floor, it’s crucial that you know how to create an appropriate surface to tile on. That’s why we’ve created this guide; to tell you everything you need to know about tiling on uneven floors. So, without further ado, read on to discover how to tile an uneven floor.
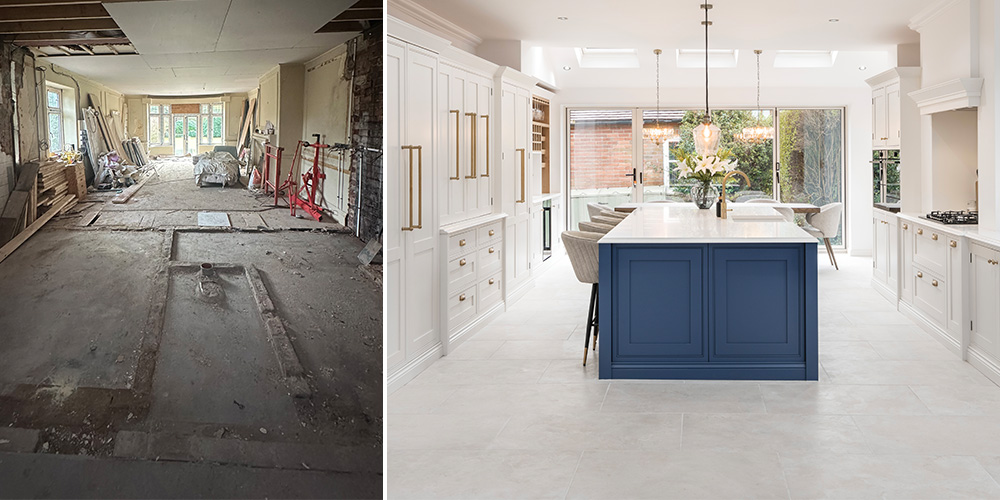
Corrie's kitchen transformation (images: The Spence Home)
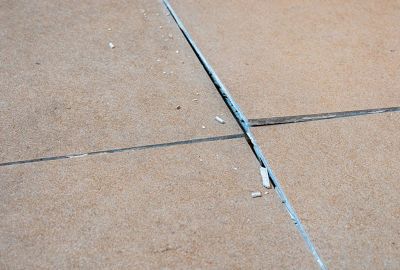
What is lippage?
’Lippage’ refers to an uneven appearance in floor tiles, specifically when some edges and corners are higher or lower than those adjacent. There are various reasons why this can happen, including poor execution when being laid or naturally occurring inconsistencies in the tiles. Read our guide on what is lippage and how to stop it, to find out more.
How to tile an uneven floor
Depending on what floor surface you’re working with, the process that allows you to start tiling an uneven floor can differ. We’ve explained how you should go about tiling onto existing tiles, and how to start laying tiles on uneven concrete and wood.
For more information, whether you’ve already taken steps to levelling out your floor, or you’re looking to start a second project that doesn’t requiring tiling on uneven floors, discover out handy guide: how to prepare your floor for tiling.
Tiling onto uneven existing tiles
As long as any underlying tiles and substrate are still structurally sound, you can lay new tiles on top. If the existing tiles are uneven, however, you can take any of the following approaches:
- Remove the old tiles completely and lay an entirely new substrate to work from.
- Apply a self-levelling compound, which will give a smooth and even surface to tile on top of.
- Angle grind at any high spots that need evening out.
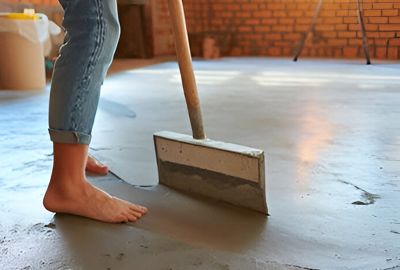
Laying tiles on uneven concrete floor
When it comes to laying tiles on uneven concrete floors, you’ll need to start by levelling the concrete surface.
- Prepare your space: Remove any furniture and anything else in the room, leaving an empty floor space. Sweep it clean of any dust, before dampening the surface, focusing on any cracks or holes.
- Start on the surface repairs: For any cracks, use a concrete filler bottle, to completely seal up any cracks and leave to fully dry before continuing. If necessary, you can use a concrete grinder to level out any spots that are noticeably high.
- Apply primer: Evenly spread a coat of concrete leveller primer across the surface, and let it dry completely.
- Mix the compound and pour: Mix together your compound according to the instructions provided, before pouring onto subfloor. Spread your compound around to ensure you’ve fully covered the area - you might need to work quickly before the compound begins to set!
- Start laying your tiles: Once you’re happy with the even surface, you can start tiling on the concrete floor.
Tiling on uneven wooden floors
Over time, it’s completely normal for wooden flooring to become slightly misshapen, wonky, and uneven. However, laying tiles requires that you first level out the wooden flooring.
Start by looking at the wooden floor surface as a whole. This involves checking for any rotten or loose spots which will need replacing as a priority. You should also keep an eye out for any protruding nails or screws. At this stage, you should also sand down any raised floorboards. After you’re finished, you can move onto tiling onto your wooden floor.
Choosing the right screed for uneven flooring
Although we've covered how to tile on an uneven floor, you may be wondering how do you fix an uneven floor in the first place? Floor screeds are an important step for those wondering how to level a floor for tiling, in order to successfully tile onto uneven floor surfaces, with the main types being sand and cement, and calcium sulphate (anhydrite). But why does your choice of screed matter? Well, simply put, the wrong type of screed could contribute to tile peeling and de-bonding.
- Sand and cement screed (also called ‘traditional’ screed) is usually made with a 1:4.5 ratio of cement to sharp sand. While it’s a cost-effective option and easy to prepare, it’s not necessarily the ideal option for uneven flooring as it can leave a patchy, rough finish. You’ll also likely need to use a self-levelling compound before tiling.
- Anhydrite screed is easy to lay and not overly expensive, and, because of its liquid form it’s often described as a self-smoothing ‘leveller’. Of the two, anhydrite will leave a much more level surface.
Learning the proper technique behind tiling an uneven floor is not only important for the aesthetic of your home, but safety too. And of course, for a professional finish you'll need to use premium installation products, such as our tile primers and cleaners to ensure your new tiles continue to look their best for years to come. If you’ve got any other DIY tiling-related projects planned, our tile installation advice page has all the information you need. Alternatively, you can always get in touch with our team for professional assistance.