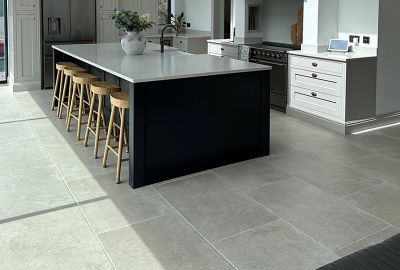

When it comes to tiling any floor, you must reinforce and prepare your subfloor properly in order to get a smooth tiling finish once your adhesive has properly set.
Failing to assess and prepare your subfloor correctly will likely result in your new floor tiles cracking, coming loose, or debonding from their adhesive entirely after a very short space of time, meaning you’ll then need to spend even more time and effort retiling your room to get it right the second time around.
One of the best ways to avoid this happening at all is by using a tiling screed. Perfect for levelling your floor and providing a firm surface to spread your tile adhesive over, there are different options out there for you to choose from. Within this article, we’ll look specifically at anhydrite screeds and why they might be right for you.
What is anhydrite screed?
An anhydrite screed, also known as calcium sulphate, is a form of structural screed similar to sand and cement screeds. It’s a vital step to take during installation, ensuring a level surface to lay your tiles upon, giving a smooth, high-quality finish.
The use of Calcium Sulphate (Anhydrite) screed is becoming increasingly popular in construction due to their benefits over sand or cement screeds, including being relatively low cost, easy to use, fast-drying, pumpable, self-levelling and offer minimal shrinkage.
It's often used with underfloor heating systems because it has excellent thermal conductivity, allowing efficient heat transfer with minimal shrinkage, reducing the risk of cracks and ensuring a more stable flooring base.
Where are anhydrite screeds used?
There are four flooring screed constructions where anhydrite screeds are used to prepare a floor for tiling:
1. Bonded floors – this is a construction where the screed lies directly on top of the floor base, only separated from your tiles by a bonding agent, such as Kerakoll Primer A, and a suitable adhesive.
2. Unbonded floors – this is a construction where the screed and floor base are separated by a damp-proof membrane (DPM) for better stability.
3. Floating floors – this is a construction where the screed and floor base are separated by a layer of rigid thermal or acoustic insulation material for better floor insulation.
4. Wet underfloor heating – this is a construction where the screed and floor base are separated by a layer of rigid insulation material upon which underfloor heating pipes are fixed. You can find out more about this in our guide to tiling on screed with wet underfloor heating.
How to identify an anhydrite screed
If you’re planning on tiling onto anhydrite screed, especially on top of a wooden floor, chances are you’ll need to apply this screed yourself. However, if you’re lucky, this type of screed may already have been applied, saving you time doing it yourself.
To identify if the material coating your subfloor is anhydrite screed, rather than concrete or cement, take some time to analyse its colour. Screed tends to be a much lighter grey, sometimes even white, when compared to concrete, so if your subfloor material is much darker, then it’s likely a screed needs to be applied.
If you already have some screed to hand, you can remove a small, inconspicuous patch of floor to see if it has a dark material beneath. If this is the case, you can use the screed you have to hand to refill the hole or coat your floor entirely if no screed appears to be present.
Finally, if you’re still not sure after both of these checks, then it’s always best to hire an expert who can tell you the difference.
Considerations to make before tiling onto an anhydrite screed
When using anhydrite screed in your tiling process, the following key considerations need to be made before laying your floor tiles to ensure they adhere to the screed correctly:
1. Is the screed dry – typically, allow for a screed drying time before tiling of one day for every 1mm thickness you applied. If you don’t, your new screed will impact the glueing potential of your chosen adhesive.
2. Is the screed damaged – while not a problem for new screeds, if you’re using an older screed which is damaged, the broken segments will need to be replaced. If, however, your screed is merely cracked, then you can fill these areas with a matching screed type or a suitable anti-fracture matting, such as Kerakoll Idrobuild Tex.
3. Is the screed clean – dust and dirt should be removed from old screeds before you work on them while new screeds need to be cleaned of any laitance that built up as it dried, both of which can impact the strength of your tile adhesive. It's vital to remove laitance (a hard dusty layer on the surface of the screed) before tiling as your tiles will just come loose over time if you don't.
4. Is the screed flat – a level and smooth screed is essential for getting a flat finish on your tiles and will make the whole tiling process that much simpler.
What primer should you use on anhydrite screeds?
The use of a bonding agent, such as Kerakoll Primer A, is key to ensuring your adhesive provides a firm and long-lasting hold for your tiles. To find out more about how to best-bond your tiles to your screed, read our guide to using the correct adhesive.
What are the pros and cons of using an anhydrite screed
There are a number of advantages that come with using an anhydrite screed over sand and cement varieties, including its easy application, low price tag, fast-drying nature, and self-levelling properties that also offer minimal shrinkage.
However, tilers must be aware that when floor tiles are fixed with a cement-based adhesive and applied directly onto an anhydrite screed, cement in the tile adhesive can result in a lattice being formed where the two meet. The interface change is enough to cause a complete de-bond of the adhesive away from the screed.
To avoid this, it’s essential that a specialist gypsum-based floor tile adhesive suitable for anhydrite screeds is used. Alternatively, a suitable bonding agent such as Kerakoll Primer A can be used to form a barrier between the substrate and the adhesive.
You should now have all you need to know about using this type of screed in your tiling project. Contact us today if you have more questions about anhydrite screed pros and cons, and don’t forget to browse the rest of our tile installation advice if you’re after similar articles.