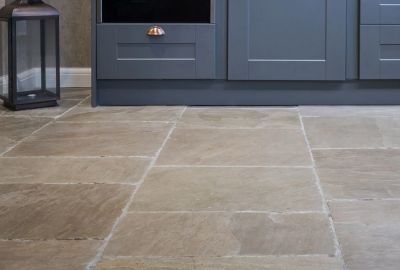
Drilling into a newly tiled wall can be an intimidating assignment, especially if it’s something you’ve never done before, so it’s understandable if you’re a little nervous about taking on the task. But it’s easier than you might think!
In this article, we’ve explained what you need to start drilling holes in tiles, and how to go about tidily and safely drilling through your wall and floor tiles (as well as how to drill through tile substrates!).
What you need when drilling tiles
Ahead of drilling wall and floor tiles, it’s important to gather the right tools and equipment. To achieve a clean finish, you’ll typically need the following:
✓ Power drill
✓ Drill bits (typically, you’re best-off choosing carbide or diamond tipped drill bits for the cleanest job, and avoid any drill bits that look old or worn out)
✓ Tape measure
✓ Masking tape
✓ Pencil or tile marker
✓ Safety goggles (or glasses)
✓ Safety gloves
✓ A wet sponge (optional, to keep you drill bits cool)
Once you’ve assembled all the essentials, you’re ready to start drilling through your natural stone or porcelain tiles.
How to drill tiles safely
Below, we’ve outlined the steps you’ll need to follow when drilling into wall and floor tiles.
Preparing your tiled area
Before we explain how to drill through tiles without cracking, you’ll need to prepare your surface:
Get your tiles ready: When drilling through tiles, it’s important to establish a steady and consistent grip, to ensure you’re pushing through exactly where you want and need. Often, though, tiles will be too smooth, which is where masking tape (or similar) comes in – its matt surface allows you to maintain the steady grip you need, without skidding across the tile surface.
Measure and mark: Once you’ve prepared your tiles, it’s time to mark the area you’ll be drilling. For accuracy, we’d suggest measuring at least twice, and marking the spot with a pencil or tile marker. Just remember, if you’re marking directly onto the tile, use a non-permanent pen that’ll wipe away.
The best way to drill through tiles
Now you’ve properly prepared your surface, you can begin drilling your tiles:
1. Choose your drill setting: Set your drill to its rotary mode to achieve the best job. You’ll want to avoid any hammer settings to prevent over-vibration and tile cracking.
2. Start drilling: Line up your drill with your marking, hold your drill with two hands, and press lightly on the trigger.
3. Apply constant pressure: Continue drilling through your marked area, maintaining a consistent pressure. Avoid pushing too hard, as this could crack the tile.
4. Cool your drill bit: Every now and then, feel free to dab your drill bit with a wet sponge to keep it from overheating. If your drill gets too hot, it can damage the tool and bit.
5. Switch your drill bit: Once you’ve drilled through the tile, you might need to switch to a more appropriate drill bit to penetrate your substrate.
6. Review your tiles: You should have now drilled through your tiles, without any cracking.
How to drill through different tile substrates
Once you’ve successfully drilled through your porcelain or natural stone tiles, you’ll need to continue drilling through your substrate. However, it’s not always as simple as keeping on pushing through – occasionally, you’ll need to change your drill bit or drill setting.
Typically, you’ll need a masonry bit to drill through stone or concrete, and a wood bit to drill through wood or plasterboard. You might also need to switch your device to its hammer setting to cleanly drill through the wall.
Once you’ve confirmed you’re using the right bit and setting, continue applying a consistent and steady rate of pressure, to drill a clean hole through the substrate.
With all of that in mind, you should now be ready to start drilling into wall tiles and flooring without experiencing cracking of any kind!
Of course, taking on any project for the first time can be daunting, so if you’re still unsure at all about how to drill tile without any breaking, get in touch with our helpful team and we’ll be happy to offer additional advice based on your tile type and size. Or for even more insight like this, discover our full range of tile maintenance guides – including how to make DIY tile repairs.


