
When it comes to tiling your bathroom, kitchen, or any area of your home, natural stone tiles offer an unmatched sense of character. Not only are these tiles ideal for those looking for a traditional tiling aesthetic, but their highly durable nature means that, once laid properly, they’ll last for years to come.
So, to help you get started, once you have a pattern in mind, here’s everything you need to know about laying natural stone tiles.
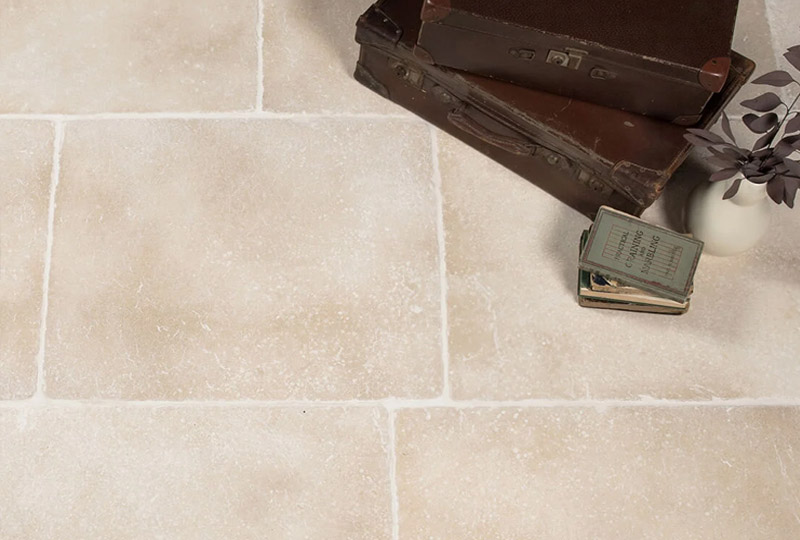
Abingdon Historical Limestone Tiles
What are the different types of natural stone tile available?
Natural stone slabs come in a variety of sizes, therefore meaning there’s a number of natural stone laying patterns for you to consider when shopping for your new tiles. Before we go into laying natural stone tiles, let’s take a quick look at the materials, finishes, and sizes you might want to consider.
Tile materials
Here at Stone Store, we provide three popular and distinct stone tiling materials for our customers to choose from:
- Limestone tiles
- Marble tiles
- Sandstone tiles
Tile finishes
To add even more versatility to our selection, we also offer stone tiles in the following finishes:
- Antiqued stone
- Polished stone
- Honed stone
Tile sizes
We offer our tiles in a range of sizes to allow the best usability for our customers in any space. From compact bathrooms to large open plan barn kitchens, our natural stone floor tiles are available in many formats.
Aswell as fixed sizes, many of our natural stones are available as a free-length option – where the tiles are supplied in a set width and a random length, which gives an effective, natural look.
How to prepare your floor when laying natural stone tiles
As with many DIY projects, how you prepare your floor for tiling will be entirely reliant on the surface material you are working with. For example, floor preparation for tiling on a wood floor will differ to anyone looking to tile onto concrete.
Once you have prepared your floor properly, you can then move on to cleaning it of any dust, grime, or grease that has built up. This is a very important step to follow as failing to clean your floors properly could impact the strength of your tile adhesive’s bond. We also recommend cleaning your tiles beforehand as well for the same reason.
Once you’re done with this, you can then finish up by carrying out what’s known as a dry run, which involves laying out your tiles in the desired pattern before you begin the installation process.
Doing this also has the added bonus of helping you work out where to start laying from and what areas of the room might need new cuts, helping you keep tile wastage to a minimum.
Whether the tiling is done by a professional tiler or if you’re planning to take the job on yourself, it’s always important to prepare like this so you have a reference point for when fixing begins.
How to lay natural stone tiles
Now that your floor is ready, it’s time to think about how you’re going to lay your new tile pattern. Typically, there are two types of natural stone laying patterns you can follow to get the best visual effect out of your tile set.
Square tiles, for example, are often well-suited to being laid out in linear straight lines, whereas rectangular tiles offer the alternative option of being laid in an overlapping ‘brick-bond’ design, for more of a classic look.
Of course, these are just our suggestions, and you’re free to get creative with whatever natural stone-laying patterns you choose to go with.
As for physically laying your tiles, we’d recommend sticking to the following process:
1. Applying your adhesive – the first step in laying your tiles involves coating your floor with your chosen adhesive. With natural stone tiles, we recommend a high-specification, rapid-setting flexible adhesive, Mapei S1, which is suitable for use with this type of material.
2. Lay your tiles – with your adhesive applied you can then move on to laying your tiles out according to your sketch and dry run plans. Be sure to measure their placement precisely so they stay in line and regularly check they’re level with the floor as you proceed. And with pattern-set tiles in particular, it’s always wise to set sections out one at a time, keeping grout lines consistent and tight to avoid encroaching into adjoining spaces.
3. Aim for a smooth finish – as your tiling spreads out, you’re likely to notice that not all of the tiles you’ve purchased will perfectly fit in your room. This means you’ll need to cut some so that they can fit into the odd shapes left when your tiling is almost finished. Therefore, be sure to measure these gaps precisely so that your cuts fit, aiming to place them in out-of-the-way areas of your room so that they don’t visibly disrupt the pattern.
4. Let your tiles dry – while you can begin sealing your tiles immediately after laying them, we recommend leaving your adhesive to dry properly before you begin the final laying stages so that your sealant isn’t affected by adhesive water residue, and you don’t disturb the pattern as you apply it.
5. Clean your tiles - once fixed, but before sealing, we strongly recommend cleaning your natural stone tiles to minimise the potential for grout haze. For this, we suggest using LTP Grimex to remove surface residues and impurities.
6. Seal your tiles – sealing your natural stone tiles after laying will provide an invisible barrier of protection against water and dirt that will make your floor easier to clean. We suggest one coat before and after grouting. Just be sure to avoid acidic cleaners when cleaning so that it stays intact. For a low-maintenance alternative that doesn't require sealing, browse our porcelain alternatives such as marble-effect tiles.
You should now have all the information you need to start laying natural stone tiles in your home. Of course, if you have any questions on this process, then we suggest getting in touch with our friendly Stone Store team today.


