
LVT (short for luxury vinyl tile) flooring is highly popular with homeowners, landlords, property developers and commercial businesses. As well as being strong, stable, durable, stain-resistant, and water-resistant, it also looks fantastic and costs less than genuine wood or stone flooring. If you’ve decided to do some budget-friendly DIY, here’s how to lay LVT flooring over any kind of subfloor.
How to measure LVT flooring
As the old saying goes, measure twice, cut once. This very much applies to LVT flooring, as it will ensure that you don’t buy too little or too much, as well as streamline its installation.
A few top tips for measuring LVT flooring include:
- Making a simple sketch of the room where you’re laying the LVT. This way you can factor in any fireplaces, alcoves and other spaces that will require extra attention to detail.
- To work out how much LVT flooring you will need, simply measure the floor and multiply the width by the length. For example, a room that’s 6 metres wide by 3 metres long will need 18 square metres of LVT. Make sure to factor in an extra 10% for waste, just as you would with classic tiles.
- LVT is sold in packs that give their size in square metres. So, if the room is 18 square metres and you factor in an extra 10% then round it up, you’ll need 20 square metres of tiles. For instance, if the LVT of your choice comes in packs of five square metres, you’ll need four packs.
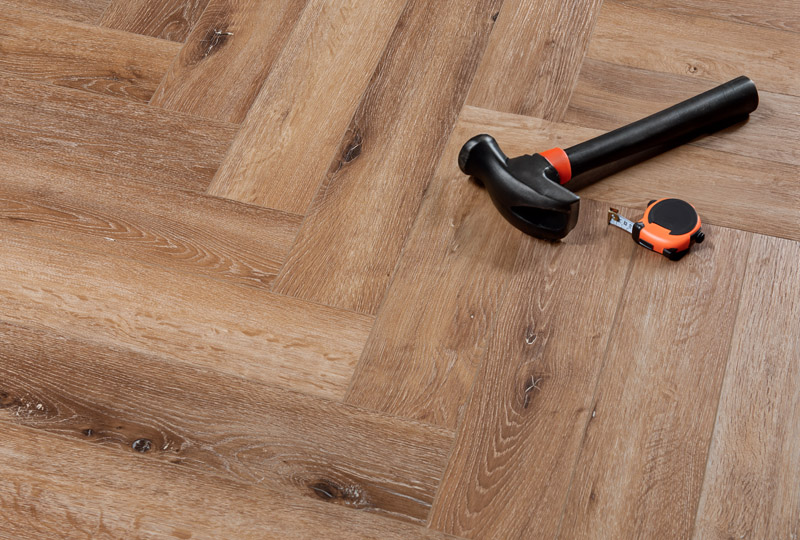
What tools do I need to lay LVT flooring?
As well as the LVT tiles, you’ll need a variety of tools to lay your LVT flooring:
- Tape measure
- Pencil and paper
- Mitre saw
- Rubber mallet
- Carpenter’s square
- Stanley knife
- Masking tape
- Vacuum cleaner
- Safety goggles, face mask, DIY gloves and kneepads
Preparing a room before laying LVT flooring
LVT flooring is incredibly versatile and can be laid onto concrete, wooden floorboards, and even existing tiles. As long as the subfloor is level, clean and dry, there shouldn’t be any issues. It’s a good idea to store the tiles in the relevant room for 48 hours before installation, as this way the LVT will acclimatise to the temperature and humidity of the room.
To prepare the room for your LVT flooring project:
1. First, remove all furniture so that you have plenty of space to manoeuvre. Make sure there are no nails or other objects sticking out of the existing floor and sweep or vacuum the room thoroughly.
2. Now that the room is ready, put on your kneepads because it’s time to start laying the LVT flooring. If new underlay is required (many types of LVT don’t come with integrated underlay), this needs to be fitted first.
3. If you’re laying plywood first (more on this below), that’s your first job to complete.
4. Next, lay lengths of underlay parallel to each other throughout the room and stick the edges together with masking tape. Remember that you usually won’t need underlay if you’ve chosen glue-down or self-adhesive LVT, whereas it’s recommended to use underlay with click (floating) LVT.
Laying LVT flooring on concrete
LVT flooring can be installed on top of concrete, providing it’s clean, dry, and level. If it hasn’t already received one, the concrete should be treated with a screed, which is a thin layer of cement paste. This will ensure the subfloor is perfectly smooth and level before laying the LVT flooring.
Laying glue-down LVT flooring over concrete
If you’ve chosen glue-down LVT, spread the adhesive over a small area starting in the corner of the room furthest from the door and install the LVT tiles along one edge of the room.
Use the rubber mallet to gently tap the tiles into place if required. When you reach another wall, some tiles will need to be measured and cut to length using your mitre saw.
Make sure to wipe dust and debris off these tiles before laying them. Continue the process until the room is finished, then vacuum the floor to remove dust and shavings.
Laying self-adhesive LVT flooring over concrete
If you’ve gone for self-adhesive LVT, the installation process follows a simple peel-and-stick approach. The only difference from the instructions above is that the adhesive is already incorporated onto the bottom of the tiles.
Laying click LVT flooring over concrete
If you’ve opted for click LVT (also called floating LVT), there is very little adhesive involved. The tiles along the perimeter of the room will usually be glued down for structural stability. The rest of the tiles then snap together using an integrated click-lock system. You can gently use your rubber mallet to secure the joints if required.
How to lay LVT flooring on wooden floorboards
Laying LVT over wooden floorboards is quite similar to the process outlined above for concrete. The existing floor must first be checked for bumps, dips, protruding nails and so on, which have to be fixed or removed before going ahead with the LVT flooring.
However, once everything is in good condition (and also clean and dry), there’s an additional step to follow when laying LVT flooring on floorboards. It’s highly recommended that a 6mm layer of plywood is laid down first, followed by a layer of underlay, as this will result in a seamless floor that remains in fantastic condition for longer.
Can you lay LVT over tiles?
As long as they’re in good condition, you can lay LVT flooring over existing tiles. Fortunately, the process is slightly simpler than tiling over other tiles.
First you’ll need to clean the floor and remove any loose material. You can then either fit underlay before laying click LVT, or simply affix the glue-down or self-adhesive LVT tiles directly onto the old tiles.
You should now know how to lay LVT flooring across any kind of subfloor. However, if you have any questions, please get in touch with our team of experts, and don’t forget to browse our tile advice for more insightful installation tips and tricks.


