
When it comes to improving your outside space, it’s hard to go wrong with a brand-new set of natural stone paving slabs to spruce up your patio, driveway, or doorstep.
Not only is natural stone a practical and aesthetically pleasing material choice, but it’s durable properties also mean that, with the right care and attention, your new paving setup will last for many years to come.
Of course, before you even start thinking about how to care for stone paving, you first need to know how to lay slabs correctly. To do this, you’ll not only need the right number of slabs for the area in question, but also the right tools, materials, and pre-planning.
To help you get started, here is our full guide covering the best way to start laying natural stone tiles in your garden. So, without further ado, read on to find out how to lay flagstones.
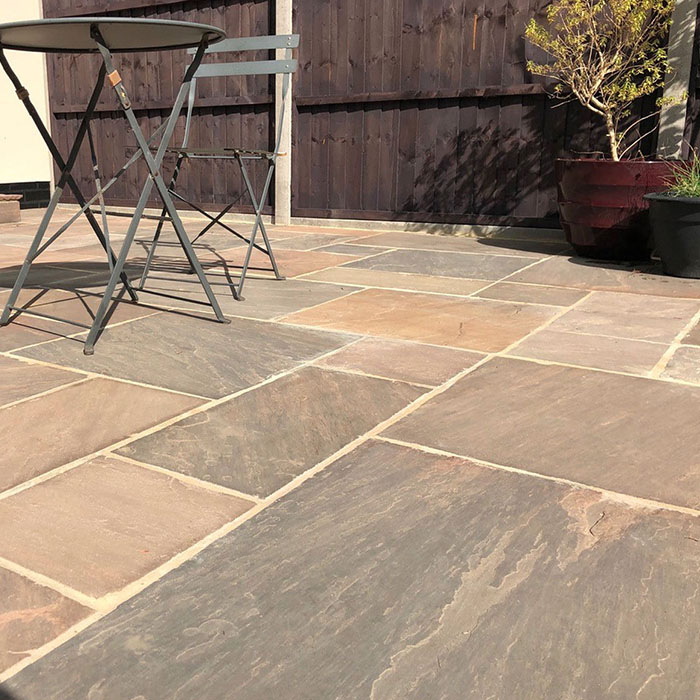
Classic Autumn Umber Sandstone
1. Pre-project preparation
Before you start laying your slabs, there are a few essential things you need to do to make sure you’re fully prepared to get your project underway:
Check your delivery is correct
First and foremost, you should check your delivery to ensure you have the correct quantity and quality of slabs that you ordered. If not, you may need to order some more, as there’s no point in starting your project if you’re missing slabs.
It’s also not uncommon to find that some of the slabs you ordered may have been slightly damaged in transit, so it’s often a good idea to order more than you need. However, this is not wholly a bad thing, as these partial slabs can still be used for areas where full slabs might need cutting to fill in gaps. We recommend ordering 10% extra for cuts and wastage, which is considered industry standard.
Gather your tools and materials
Second, you’ll need to make sure you have all the right tools and materials required for laying natural stone tiles. In our experience, professional landscapers tend to make use of the following tools:
- Gloves and goggles for safety
- Spade and shovel
- Wheelbarrow
- Brick trowel
- Pointing trowel
- Rubber mallet
- Spirit level
- String line
- Selection of line pins or stakes
- Soft brush
- Tape measure
- Small cement mixer
- Plate compactor (‘wacker’ plate)
- An angle grinder or petrol saw
Naturally, you don’t have to purchase all this equipment for your project, and it may be more feasible to hire the larger powered equipment rather than have it gathering dust in the shed once you’re done.
And as for your materials, you’ll need the following:
- Your natural stone paving slabs
- Crushed limestone (for ‘capping)
- A damp-proof membrane
- A Type 1 MOT of your choice
- A powdered or preprepared cement mix – usually sharp sand and cement mixed at a ratio of 4 sand to 1 cement.
For an idea of how much of each material you’ll need to purchase, it’s best to speak to a paving expert on the subject, such as those on our Stone Store team!
Clear the area of any debris
This should go without saying, but it’s always important to clear your project area of any debris that might get in the way of construction, so take the time to tidy your assigned area before you get started.
2. Do a dry run
Before laying down and cementing any slabs, it’s very important that you carry out what is known as a ‘dry run’, so you can give yourself the best idea of how your new paving setup will look.
Taking your slabs, carefully lay them out in the most practical and aesthetically pleasing way, one that ideally keeps the need to cut slabs to a minimum, and then mark this out using your string line. This will let you see the area you’re working in once your slabs have been removed.
With this done, remove your slabs and begin preparing the base your paving will sit on.
Ensuring you have the correct drainage
One thing you want to avoid when laying natural stone paving slabs is the excessive build-up of water pooling on their surface.
To avoid this, your slabs need to be laid with a slight slant so that rainwater can drain away into your garden. This may be done by adding a purposeful gully or drain to your paving setup or by simply leaving room for a drop-off into the garden.
The industry standard for the fall of natural stone paving is a ratio of 1:80. This means that for every 80 units of distance, the level must drop by one unit. For example, a patio which runs 4 metres from the house, will have to drop by 4000mm divided by 80, which is 50mm.
3. Laying your slab’s base
All paved areas, whether driveways, paths, or terraces, require a stable base for them to be placed on. However, every project site is different, and you’ll have to use your judgement at the start of the project as to what strength of base you’ll need.
Generally speaking, it’s usually best to opt for a strong base from the outset, as this will minimise the chance of you having to re-lay some of your natural stone slabs in the future. So, with that in mind, the following steps can be used when preparing your paving base:
1. Dig your project site: start by digging up the ground where your paving is going to lie, so that you can lay the sub-layer and ensure that your slabs sit at the level you want them to. The depth of this should be roughly 150mm if you’re aiming to have your paving flush with the ground.
2. Add a capping layer: add a ‘capping layer’ of crushed limestone over your work area. This is important if the earth beneath is particularly silty, as it will provide more stability. Make sure this layer is compact and flat before moving on.
3. Lay your membrane: lay down your damp-proof membrane to prevent the upward migration of fine soil particles and contaminants from beneath. This will also make it easier to lay your sub-base.
4. Coat your membrane: take your chosen Type 1 MOT and coat your membrane with an even 100mm layer before taking your plate compactor and levelling it.
4. Laying your paving
With your base construction out of the way, it’s now time to start laying your natural stone paving slabs. To do this, start by preparing your chosen cement mixture and applying it to the highest area of your sub-base to a depth of approx. 50mm.
The best way to lay slabs is applying mortar and positioning one at a time. Once spread out, gently lay your first slab on top of it and tap it level using your rubber mallet. Once you’re satisfied, you can use your spirit level to check that it’s flat and then repeat this for your remaining slabs. Remember you have to account for a “fall” for rain to run off.
Generally, as you're laying paving, you’ll want to be sure to leave a suitable amount of room between your slabs – typically 8-15mm for natural stone and 3-4mm for porcelain paving. This will allow you to apply grout between them, further bolstering their strength, as well as mimicking the typical style of indoor natural stone tiling.
Cutting natural stone paving slabs
As you’re laying your natural stone paving, you’ll no doubt come across areas that require you to cut your slabs in order to make them fit. This is where your power saw or angle grinder comes in, and we recommend cutting your slabs in the following way:
1. Using a tape measure and chalk/pencil, measure the space where the slab will be slotted and mark the cutting line on both sides of the slab.
2. Secure the paving slab to a workbench with the C-clamps. If done properly, the slabs should not move once secured.
3. Begin cutting through the slab with your power saw, using the marked line as a guide. Once you’ve cut about 1cm through one side, turn the slab over and repeat the process on the other side.
4. Continue until you have cut all the way through, and then lay your newly cut slab into place.
Ideally, this sort of cutting should be done before you lay your bonding mix down for the slab, as this will make it easier to measure where to cut, and it doesn’t put you on a drying time limit.
5. Filling in your slab joints
As you go about laying your slabs, the joints between them can be filled using a mortar mix and trowel – the same mix you’ve been using for your paving slab adhesive.
However, if you want something just as durable and less messy, you might want to use a purposeful jointing compound that is brushed in between the slabs. Quicker to make and use than traditional mortar, it can be applied in all weather conditions and once set is crack and frost-resistant thanks to its flexible polymer ingredients.
6. Checking if your stone is laid correctly
Once laid, any outdoor tiling or paving stones should be sound and stable and there should not be any ‘lips’ from one slab to another that could pose a trip hazard.
You should check surface levels and profiles regularly as you go by standing back and making a visual inspection and maintain accuracy by using a long spirit level or a straight-edged length of timber. This ensures adjacent paving slabs are level and don’t need shifting.
Lifting slabs to re-fix them is never fun and is very time-consuming. However, it’s essential to correct any problems while the fixing compound is still wet, as it’s much easier than when it’s dried.
How long before I can walk on paving slabs?
Finally, with the last slab laid and everything aligned correctly, you can step back and admire your handy work. However, you can’t walk on your new path or patio just yet.
To ensure that everything has dried correctly and that your slabs don’t move out of alignment, we recommend waiting for a full 24hrs from when you finished construction before walking on your new paving.
As you’ve no doubt worked out, laying paving is no easy task, though by arming yourself with the right knowledge and tools, you can certainly create something beautiful that you can be proud of.
Of course, if you need further help when following your paving dreams, then why not get in touch with the Stone Store team today? We have plenty of experts on hand to help provide you with tiling tips, and you can also browse our outdoor paving advice for more in-depth guides like this one.


